

Motivations
I happen to be moving house soon, so I feel like now is the perfect time to introduce myself to the world of smart homes. As a fan of FOSS, I will be using Home Assistant as the platform to build my smart home from, but as it stands I have nothing to connect it to.
A big part of a smart home is the effective use of sensors, so I thought the best place to start in my smart home journey would be to build myself a sensor. As you might have guessed from the title of this blog, I decided to build an Air Sensor, but why?
Air is important, and knowing that I use things like 3D printers, soldering irons, etc., I was curious about the air in my house and wanted to measure it. Most commercial pre-built sensors cost over £100 if you want to measure more than just temperature and humidity. I felt like I could beat that price by a fair margin if I made one myself. Long story short, with a bit of effort, I managed to make a high-quality home air sensor for around £35 of total material cost!
Measures of Air Quality
If you haven't looked into this topic yourself, this question is a fair one, as commercial air sensors vary a lot on what information they provide and can sometimes be misleading. Listed below are the most common things air sensors measure, usually combining multiple of them to produce more comprehensive results.
- Temperature - One of the simplest measurements of air, the temperature, usually in degrees C or F.
- Humidity - Usually as a percentage of relative humidity, it tells you how much water vapor is suspended in the air.
- Particulate Matter - Typically abbreviated as PM, it measures the quantity of tiny particles in the air in μg/m³. For example, a PM2.5 sensor would tell you the quantity of particles less than 2.5 micrometers in size.
- Oxygen - An O₂ Sensor gives you the percentage of oxygen in the air, typically 21% by volume.
- VOC - Volatile Organic Compounds cover a wide range of gases, many can cause irritation or be harmful, but it is also worth noting that some aren't. Typically measured in parts per billion or million (ppb / ppm).
- NOx - Nitrogen Oxides are a harmful air pollutant also measured in parts per billion or million (ppb / ppm).
Hardware
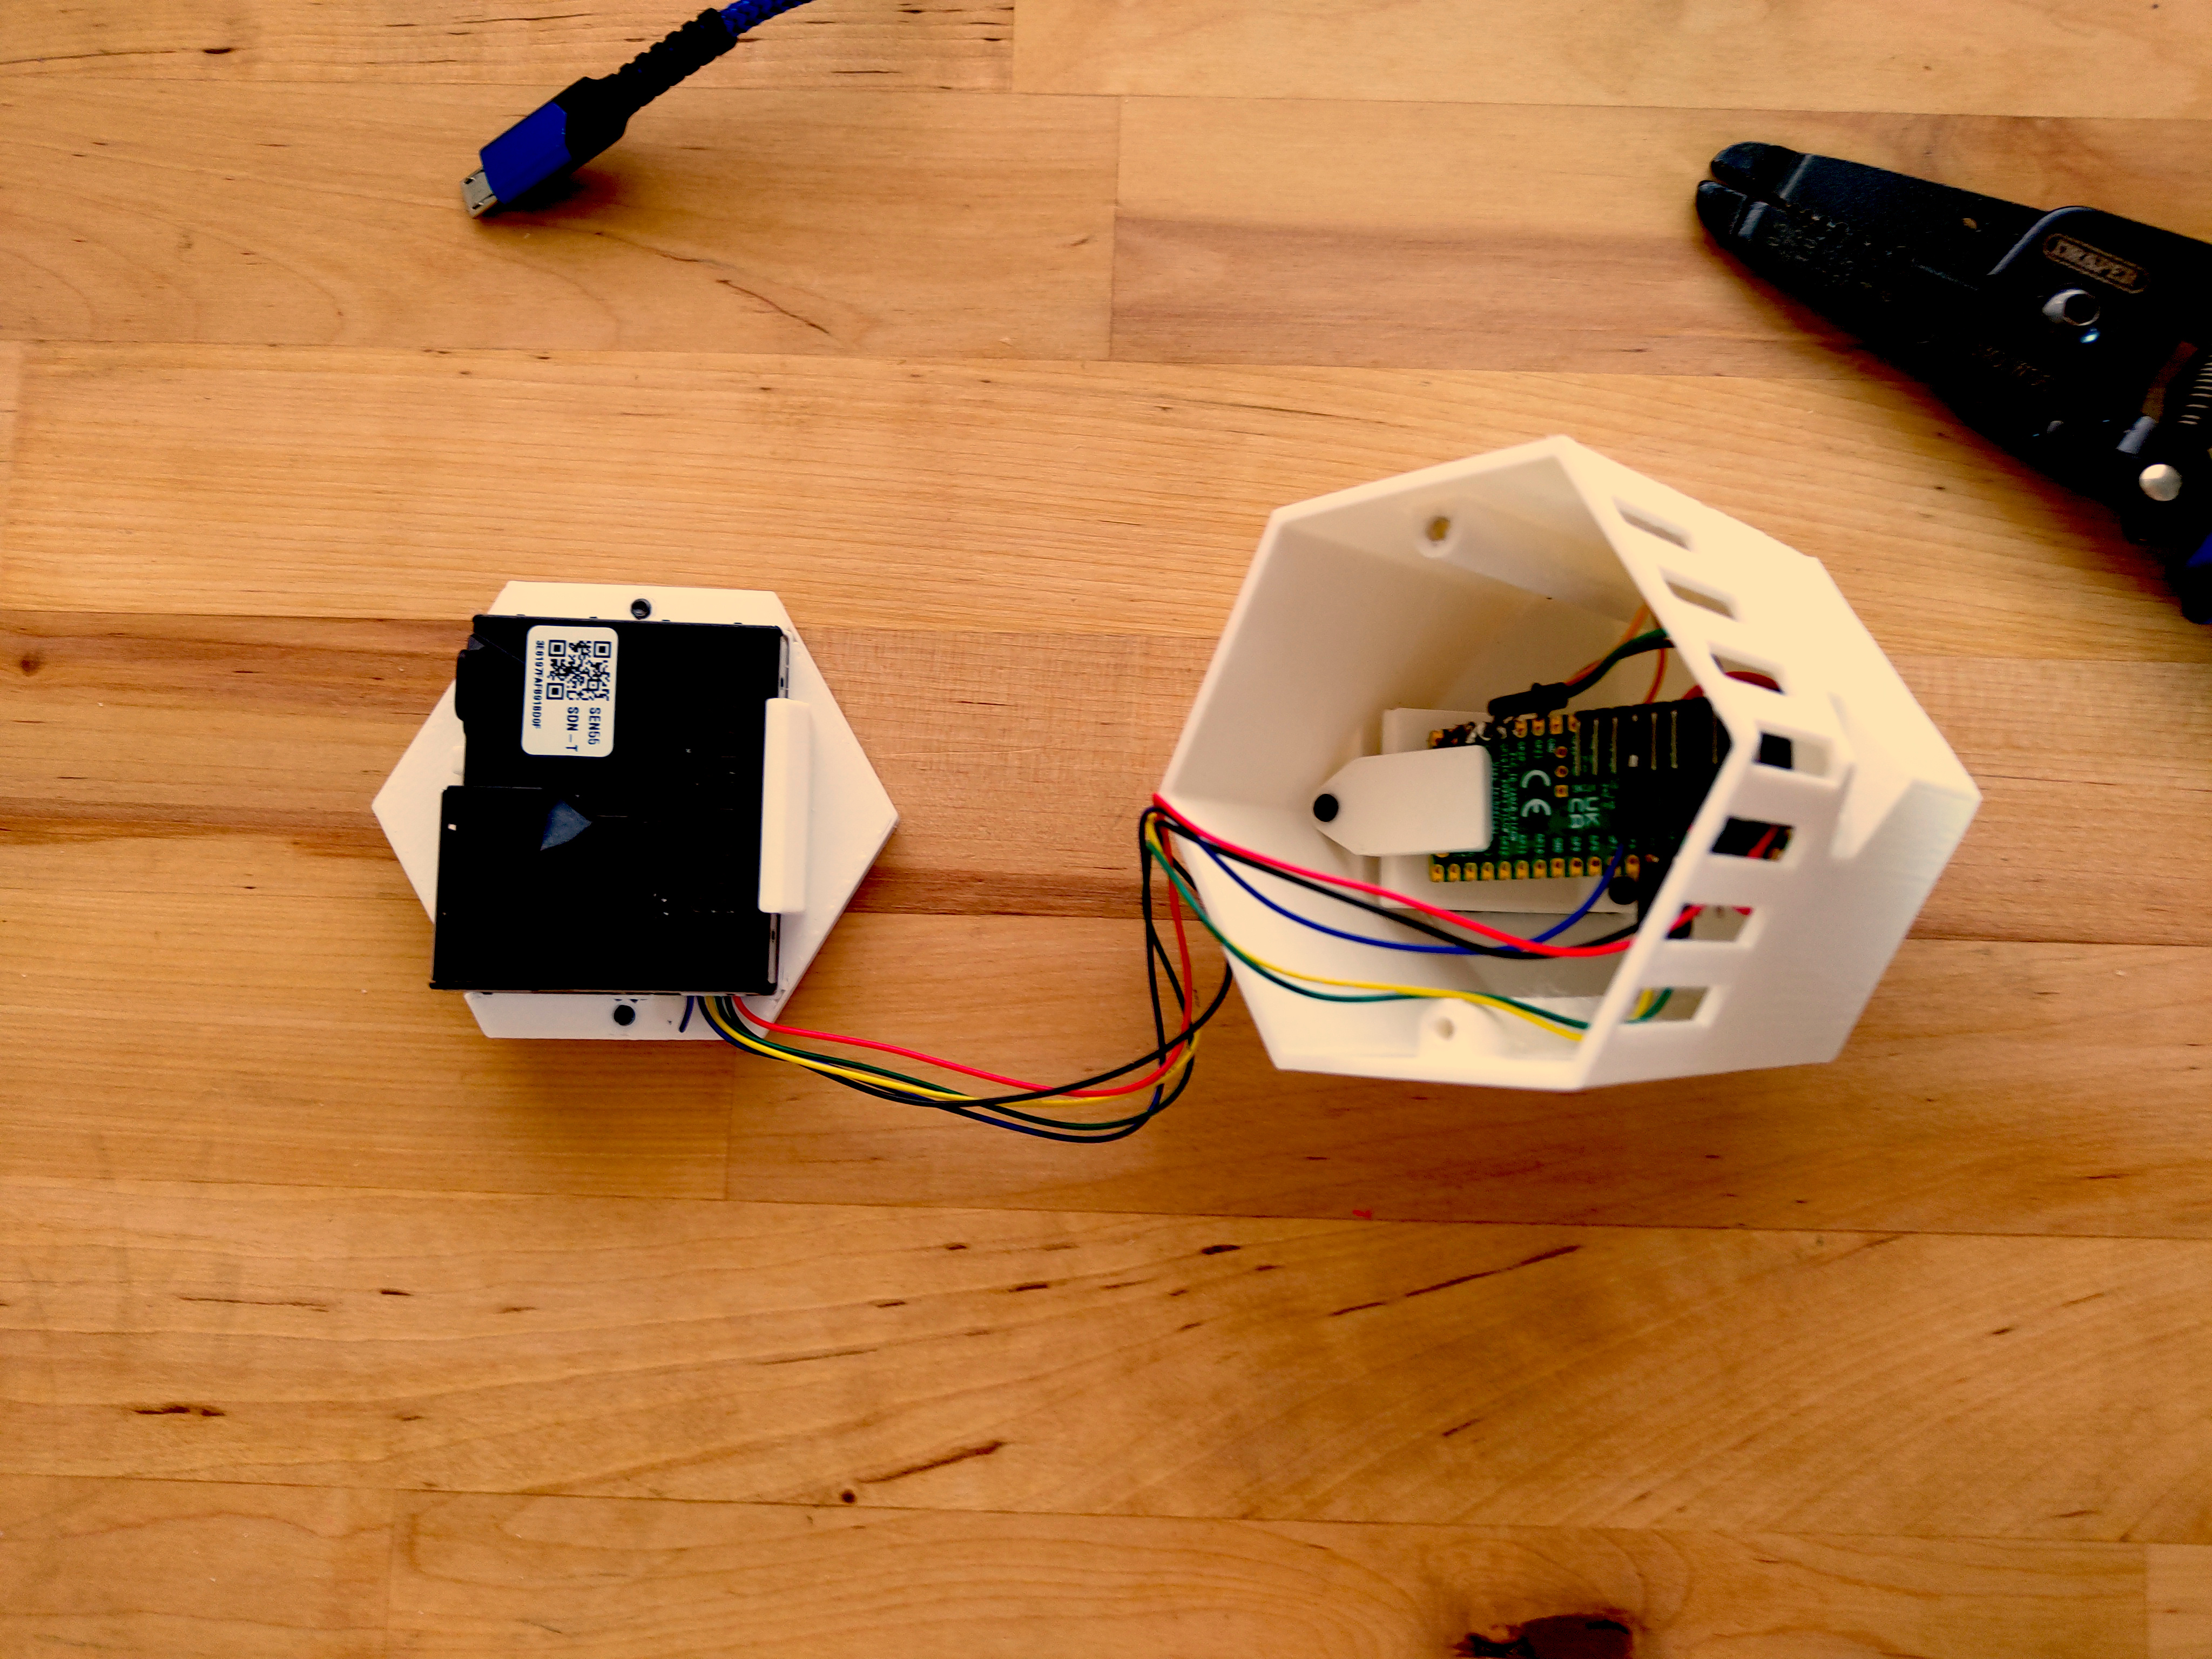
At its core we need a physical sensor to measure the air, after some research on the various choices, I settled on the Sensirion SEN55 which is available from mouser for just under £24. At this price it features temperature, humidity, particulate matter, VOC and NOx sensing. Although it's worth noting that this particular sensor measures VOC and NOx as a relative index from 0 to 500 rather than parts per million / billion.
To connect everything up, I opted to use a Raspberry Pi Pico W because I happened to have one laying around, but any other WiFi enabled microcontroller like an ESP32 would do the job. Additionally, I'm including a 128x64 OLED I2C Display that will show all the data live, so you don't have to go to the Home Assistant page to check the current values.
As for the housing, I designed a 3D printable case that produces a snug but workable fit for all the components, which is available to download for free at the end of the blog!
Total Hardware Breakdown (~£35):
- SEN55 Sensor - £24
- Pi Pico W - £4.50
- I2C OLED Display - £6.00 (affiliate link)
- 3D Printer Filament - £0.50 (For the amount used) (affiliate link)
Software
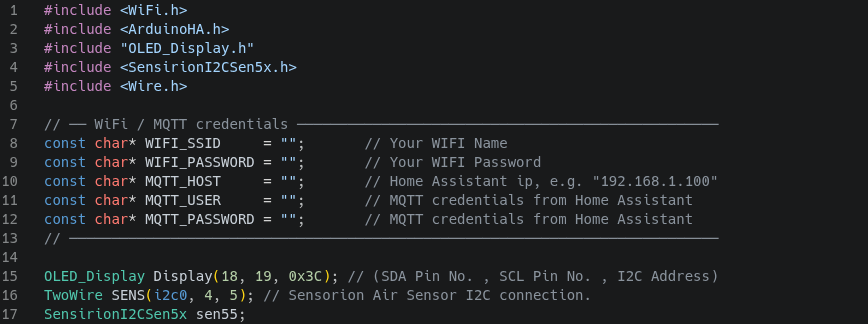
The code is written using PlatformIO, although it should be compatible with the Arduino IDE. As shown, it exposes the key parameters needed to connect up to your network as some constants at the top of the main.cpp file. The code, libraries used and platformIO config can be downloaded at the end of the blog, for free too!
The code assumes you already have Home Assistant running and have installed an MQTT integration.
Downloads
Thanks for reading!